
Your Guide to Plywood Board Sizes and Dimensions
Walk into any lumber yard, and you’ll see one size dominating the stacks: the 4-foot by 8-foot (1220mm x 2440mm) plywood sheet. This isn't just a popular choice; it's the undisputed industry standard, forming the backbone of countless construction jobs and DIY projects across the globe.
Its popularity is no accident. This size strikes the perfect balance, offering enough surface area to cover large sections of walls or floors efficiently while still being manageable enough to transport and handle on a job site.
A Quick Guide to Plywood Board Sizes
While the variety of plywood types can feel a bit overwhelming, the dimensions are thankfully quite standardized. Getting a handle on these common sizes is your first real step in planning any project. It’s what helps you calculate material needs accurately, which in turn saves you from wasting time, money, and material.
The reason the 4' x 8' sheet reigns supreme comes down to simple construction logic. It’s designed to work perfectly with standard building frames, where wall studs are almost always spaced 16 or 24 inches apart. A single sheet fits cleanly across these supports, minimizing cuts and speeding up installation.
This image shows that classic 4' x 8' sheet, a familiar sight to anyone who's ever built anything.
It’s these dimensions that architects, engineers, and builders base their plans on, from initial blueprints to the final cut list.
Standard Imperial and Metric Dimensions
For anyone working on projects in a global hub like the UAE, it’s smart to be comfortable with both imperial and metric measurements. While the 4' x 8' sheet is the hero product, you'll also find smaller, pre-cut "project panels" that are perfect for smaller-scale tasks where a full sheet would be overkill.
This standardization is what makes global collaboration so smooth. A builder in Dubai can look at plans from an architect in London and know that "one full sheet" means the exact same thing, ensuring everyone is on the same page.
Here’s a quick-reference table to help you keep the most common plywood sizes straight.
Standard Plywood Sheet Sizes Imperial vs Metric
| Common Name (Imperial) | Dimensions (Imperial) | Dimensions (Metric) |
|---|---|---|
| Full Sheet | 4 feet x 8 feet | 1220 mm x 2440 mm |
| Half Sheet | 4 feet x 4 feet | 1220 mm x 1220 mm |
| Project Panel | 2 feet x 4 feet | 610 mm x 1220 mm |
| Large Format | 4 feet x 10 feet | 1220 mm x 3050 mm |
Getting familiar with these common sizes is the foundation of good project planning. Choosing the right one from the very beginning is key to optimizing your cut list and ensuring a smooth workflow, a topic we’ll dive into a bit later in this guide. This one decision really does set the stage for everything that follows.
Understanding Plywood Dimensions and Thickness
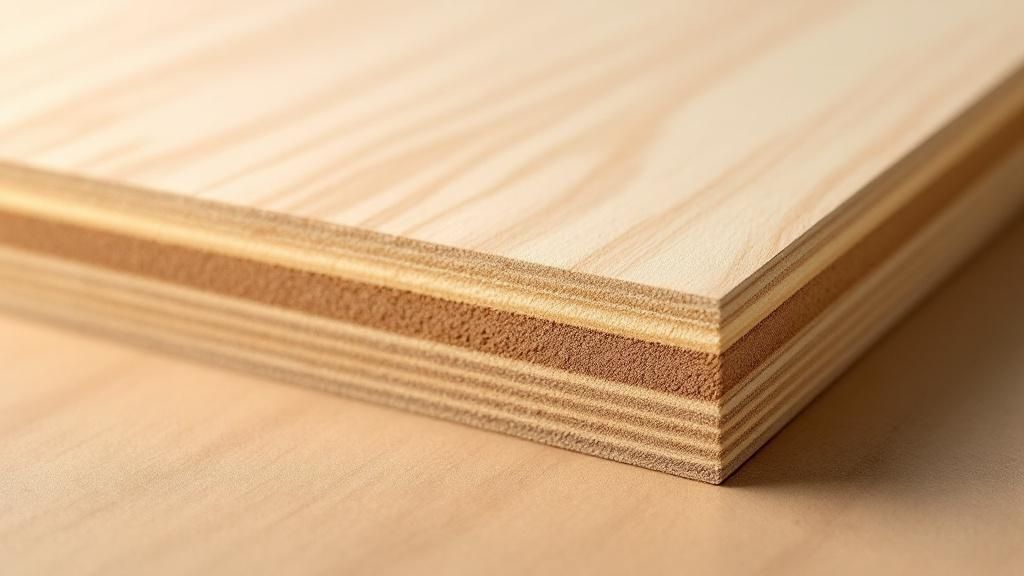
When you're looking at plywood, it’s easy to get hung up on the standard length and width, like the common 4' x 8' sheet. But the real game-changer for any project is the thickness. A panel's thickness is what dictates its strength, its weight, and ultimately, where it can be used. Making the right choice here is the difference between a rock-solid bookshelf and one that sags under the weight of a few paperbacks.
This aspect of plywood board sizes is critical for both the structural integrity of your build and its final look and feel. If you use a sheet that’s too thin for a structural job, it's bound to fail. On the other hand, using an overly thick board for a simple decorative piece just adds unnecessary weight and drives up your costs.
Nominal vs. Actual Thickness Explained
One of the first things that trips people up when they're buying plywood is the difference between its nominal thickness and its actual thickness. It's a small detail, but getting it wrong can have big consequences for your project.
- Nominal Thickness: This is the name you see on the shelf—think "3/4-inch" or "1/2-inch." It’s a rounded, easy-to-remember number that’s used for marketing and quick identification.
- Actual Thickness: This is what the panel really measures. Because of the manufacturing process, which involves pressing and sanding the layers, the final product is almost always a little thinner than its nominal label.
For instance, a sheet marketed as 3/4-inch plywood often has an actual thickness closer to 23/32 of an inch. While that might not sound like a huge difference, it's absolutely crucial when you're cutting joints like dadoes or grooves, where a perfect, snug fit is everything. My advice? Always measure your board with a caliper before you even think about setting up your tools for those critical cuts.
Key Takeaway: Never trust the nominal size to be the exact measurement. Always measure the actual thickness of your plywood sheet yourself. This simple step ensures your cuts, joints, and all the final components of your project will fit together perfectly.
A Guide to Common Plywood Thicknesses and Their Uses
Picking the right thickness comes down to balancing three things: strength, weight, and cost. Thicker panels are more rigid, but they're also heavier and will hit your wallet harder. Knowing the typical jobs for each size is the best way to land on the perfect choice for your needs.
- 1/8" (3mm): This stuff is incredibly light and flexible. You'll see it used mostly for decorative work like drawer bottoms, the backs of cabinets, creating curved structures, or as a thin skin stretched over a frame. It offers almost no structural support.
- 1/4" (6mm): A really popular choice for things like drawer bottoms, backing for shelves, and some internal cabinet partitions. It adds a good amount of rigidity without adding much weight and is a favorite for craft projects and workshop jigs.
- 1/2" (12mm): This is a versatile, middle-of-the-road option. It's great for utility cabinets, furniture that will be painted, and basic shelving that won't be holding anything too heavy. It strikes a nice balance between strength and being easy to handle.
- 3/4" (18mm): The true workhorse of the plywood family. It has an excellent strength-to-weight ratio, making it the top choice for cabinet carcases, heavy-duty shelving, subflooring, and workbenches. If you're building structural furniture, this is almost always your go-to thickness.
- 1" (25mm) and Thicker: Now you're in heavy-duty territory. These super robust panels are reserved for things like industrial shelving, beefy worktops, stair treads, and structural flooring designed to support a massive amount of weight.
This need for standardized dimensions is a global reality. Take the United Arab Emirates, for example, which imported approximately 353,000 cubic meters of plywood—that's about 16% of the entire Middle East's import volume. This massive trade relies on consistent plywood board sizes like 1220mm x 2440mm to ensure that materials meet both international building standards and local construction practices. To learn more about these market dynamics, you can find a detailed analysis of plywood consumption on IndexBox.
How Plywood Grades Influence Size and Use
Not all plywood is the same, and if you don't understand the grading system, you could end up with the wrong panel for your job. The grade tells you everything about the quality and look of the panel's surface, which directly impacts where it should be used and even the plywood board sizes you'll find it in.
Think of the grade as a report card for the face and back veneers of a plywood sheet. This system uses letters from A to D to describe the visual quality of the wood. A higher grade means a cleaner, smoother surface. A lower grade means you should expect things like knots, splits, and other "character marks." This is what separates a beautiful, furniture-ready panel from a tough, structural one.
Decoding the Plywood Grading System
Plywood grades usually come in pairs of letters, like "AC" or "CDX." The first letter tells you about the "face" veneer (the side you see), and the second letter describes the "back" veneer.
- A-Grade: This is the best you can get. It's a smooth, sanded surface with no knots or visible repairs. A-grade is what you want for high-end cabinets, beautiful furniture, or any project where the wood grain is on full display.
- B-Grade: Right behind A-grade, B-grade veneer is also smooth and sanded. However, you might find some very neat, minor repairs like small wood patches (often called "plugs") or tight knots up to 1 inch across. It’s a great option when you need a good finish but can live with a few tiny imperfections.
- C-Grade: Now we're getting into the more functional grades. C-grade surfaces are unsanded and can have knots up to 1.5 inches, along with some splits and discoloration. It's a true workhorse, perfect for jobs where strength matters more than looks.
- D-Grade: This is the most basic veneer quality. It's unsanded and can have larger knots and unrepaired splits that can be up to 2.5 inches. D-grade is strictly for structural use where the panel will be covered up, like in wall sheathing or subflooring.
So, if you see a sheet labeled "AC" plywood, it has a premium, A-grade face but a lower-quality, C-grade back. This makes it a smart, cost-effective choice for things like cabinet doors, where the inside doesn't need to be as perfect as the outside.
Pro Tip: One of the most common panels you'll see on a construction site is CDX plywood. The "C" and "D" refer to the face and back grades. The "X" means the glue used is for exterior exposure—it can handle getting wet during construction but isn't meant to be permanently waterproof.
Plywood Grades and Common Applications
To make it even clearer, here’s a quick-reference table that matches plywood grades with their most common uses and what you can expect from their appearance.
| Grade | Surface Appearance | Common Applications |
|---|---|---|
| A | Smooth, sanded, no knots. Paintable and stainable. | High-end furniture, cabinetry, architectural millwork, decorative panels. |
| B | Mostly smooth, sanded. May have small, tight knots or neat repairs. | Cabinets, shelving, utility furniture, paint-grade projects. |
| C | Unsanded. Can have knots up to 1.5 inches, splits, and discoloration. | General construction, subflooring, wall and roof sheathing, crates. |
| D | Unsanded. Allows for larger knots up to 2.5 inches and unrepaired splits. | Hidden structural uses, temporary bracing, packaging. |
| CDX | C-grade face, D-grade back, with exterior exposure glue. | Roof sheathing, subflooring, wall sheathing—general construction workhorse. |
This table should help you quickly identify the right panel for your project, ensuring you don't overpay for a finish you don't need or compromise on quality where it counts.
How Grade Affects Available Sizes
The grade of a plywood sheet doesn't just dictate its use; it also tends to affect the plywood board sizes you can buy.
High-end A-grade and B-grade panels, often made from hardwoods like birch or oak, are widely sold in standard 4' x 8' sheets. But you'll also find them in smaller "project panels" like 2' x 4' or 4' x 4' to cater to furniture makers and DIYers who don't need a full-size sheet.
On the other hand, structural grades like CDX are almost always produced in large formats, such as 4' x 8' and 4' x 10'. This makes sense, as they are meant for covering large areas quickly and efficiently in applications like roofing and sheathing. For jobs that require serious water resistance, you might need something even tougher. You can learn more about these durable options in our guide on film-faced plywood, which is ideal for harsh environments.
Choosing the Right Plywood Size for Your Project
Picking the right size of plywood is more than just grabbing a sheet that looks about right. It’s a strategic move that has a real impact on your budget, your workload, and the final quality of your project. When you get this right from the very beginning, you avoid wasting expensive material, cut down on difficult cuts, and make sure everything comes together smoothly.
A little thoughtful planning goes a long way toward maximizing every square inch of a sheet. Before you even think about picking up a saw, just taking a few minutes to map out your cuts can be the difference between needing one sheet or two. That saves you both money and an extra trip to the supplier. This is especially true when you're working with standard plywood board sizes, like the common 4' x 8' sheet.
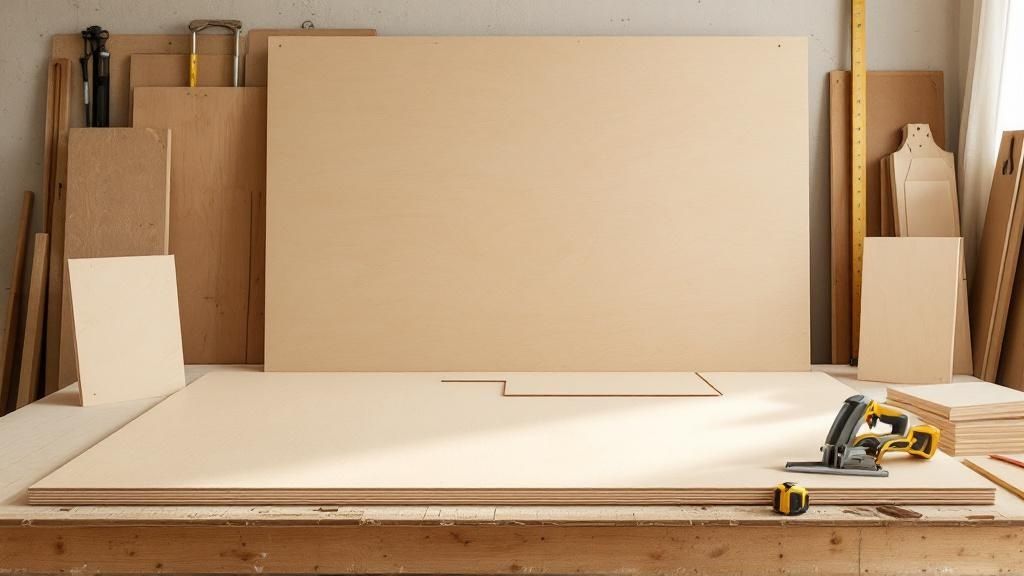
Start with a Detailed Cut List
A cut list is the blueprint for your project. Don't even start without one. It's a simple, organized list of every single piece you need to cut from your plywood, complete with its exact dimensions.
Trust me, forgetting a piece or messing up a measurement halfway through a build is a fast track to frustration and wasted wood. A detailed cut list forces you to think through every component ahead of time, ensuring nothing gets missed. This list will be your most valuable tool for planning an efficient layout.
Plan Your Layout to Minimize Waste
Once you have that cut list, your next job is to plan the layout. This is basically a visual diagram showing how you’ll arrange all the pieces from your list onto a standard plywood sheet to get the absolute most out of your material.
Think of it like a game of Tetris. The goal is to fit all your required shapes onto the board with as little scrap left over as possible. Professional cabinet makers live and die by this principle, often using software to optimize layouts, but a simple sketch on paper works just fine for most of us.
Key Layout Considerations:
- Group Similar Dimensions: Try to place pieces with the same width or length next to each other. This lets you make long, straight cuts with a circular saw, which is much more efficient.
- Account for the Kerf: The "kerf" is the material that your saw blade turns into dust with every cut. It's typically about 1/8 inch or 3mm wide. You absolutely have to factor this gap in between your pieces on the layout plan, or your final parts will be too small.
- Grain Direction: For any project where looks matter, like furniture, make sure the wood grain will run in the same, pleasing direction on all the visible pieces. Mark this right on your layout.
Expert Insight: Always try to get your largest pieces cut first. It gives you much more flexibility to arrange the smaller components on what’s left of the sheet. This simple habit drastically reduces the chances of ending up with a pile of unusable scraps.
Practical Example: Building Bookshelves
Let's imagine you're building a simple bookshelf that's 36 inches wide by 48 inches tall, with a depth of 12 inches. You'll want to use 3/4-inch (18mm) plywood for good strength.
Your cut list would look something like this:
- Two Sides: 12" x 48"
- Top & Bottom: 12" x 34.5" (That's the 36" total width minus the thickness of the two side pieces)
- Three Shelves: 12" x 34.5"
By sketching this out on a single 4' x 8' (48" x 96") sheet, you'll see how all these parts can fit perfectly with very little waste.
For projects that need to be extra durable, especially in humid or wet areas, the type of plywood you choose is just as critical as the size. To get a better handle on more robust options, our article on 18mm marine plywood breaks down its properties and best uses. This kind of careful planning, considering both size and material type, is the key to a successful outcome every time.
A Look at International and Metric Plywood Sizes
While anyone in the North American building trades knows the standard 4' x 8' sheet like the back of their hand, a huge part of the world runs on the metric system. If you're managing international projects or sourcing materials from Europe or Asia, understanding metric plywood board sizes isn't just a "nice-to-have"—it's absolutely critical for getting the job done right.
These metric sizes aren't just random numbers; they're designed to fit perfectly within construction systems built on metric units. This simple fact helps you sidestep the awkward conversions and frustrating little errors that pop up when you try to shoehorn imperial sheets into a metric-based design. The most common metric standard you'll run into is the 2500mm x 1250mm sheet. At a glance, it seems awfully close to the imperial 4' x 8' (2440mm x 1220mm), but that small difference is very intentional.
That slightly larger size is optimized to work seamlessly with European building standards, where design modules are often based on clean multiples of 125mm and 250mm. Sticking to the system drastically cuts down on waste and shaves valuable time off cutting on-site.
Common Metric Plywood Dimensions
Just like the smaller "project panels" you see in imperial markets, the metric world has more to offer than just one primary size. Getting familiar with these dimensions is the key to accurate planning and ordering.
Here are the standard metric sizes you’re most likely to encounter:
- 2500mm x 1250mm: This is the workhorse of European construction. It’s the go-to for large-scale sheathing, flooring, and structural work in any building designed in metric.
- 2440mm x 1220mm: While technically just a direct conversion of the imperial 4' x 8' sheet, this size is produced all over the world. It often serves as a "universal" standard in regions that use a mix of measurement systems, like the UAE.
- 3050mm x 1525mm: A much larger sheet, roughly 5' x 10', used when you need to cover more ground with fewer seams. Think large-format wall paneling or massive custom furniture pieces.
When you use these native metric sizes on a project that was designed in meters and millimeters, you eliminate rounding errors and ensure every single piece fits exactly as the architect intended.
Practical Example: Let's say you're building a bank of cabinets that needs to be exactly 2.5 meters wide. Grabbing a standard 2500mm metric sheet means you get a perfect, full-length piece with just one cut. No extra seams, no weak points. If you tried to make that same cabinet from a 2440mm (4' x 8') sheet, you’d be forced to join two pieces together, creating an ugly seam and a structural weakness.
Global Markets and Regional Standards
The need for standardized plywood is a huge driver of global trade, impacting everything from forestry management to project deadlines. This is especially true in rapidly growing regions. The plywood market in the Middle East and Africa, for instance, was valued at around USD 3.85 billion and is expected to climb to USD 4.91 billion by 2030. Boards between 5mm and 12mm thick dominate this market, which tells you a lot about the demand for versatile, standard-sized panels. You can dive deeper into the Middle East and Africa plywood market on TechSci Research.
Sticking to these sizes isn't just about making life easier; it's often a matter of regulatory compliance. For any project in the UAE, sourcing materials that fit established local norms is crucial for a smooth build. You can learn more about how material selection is tied to regulations by reading our guide on building materials quality standards in the UAE. It’s the best way to ensure every component, from the structural panels down to the screws, meets the non-negotiable specs for safety and performance.
Frequently Asked Questions About Plywood Sizes
When you're dealing with building materials, a few practical questions always seem to come up. It's no different with plywood. People often wonder what the label really means or what to expect when they get to the lumber yard. This section tackles those common questions head-on.
We're here to clear up the confusion so you can feel confident choosing, buying, and using the right plywood for your next job, whether it's a weekend DIY project or a full-scale construction build.
Are Plywood Sheets Actually 4 Feet by 8 Feet?
Not always, and that little detail can make a huge difference in precision work. While 4 ft x 8 ft (1220mm x 2440mm) is the standard nominal size you'll see advertised, the sheet in your hands might be slightly different. It's actually pretty common for manufacturers to make sheets just a hair oversized.
That tiny bit of extra material is there on purpose. It gives you a full 4x8 area to work with after you've trimmed off the rough factory edges for a perfectly square panel. On the flip side, some pre-sanded hardwood plywoods might be a fraction smaller because the sanding process shaves off a tiny amount of material. The golden rule? Always pull out your tape measure before making any critical cuts.
What Is the Most Versatile Plywood Thickness?
If you're looking for one thickness that can do it all, 3/4-inch (18mm) plywood is the undisputed champion of versatility. It hits that sweet spot between strength, stability, and manageable weight, making it the default choice for an incredible range of projects.
It’s beefy enough for sturdy furniture, reliable shelving, and solid workbenches. It also holds screws like a champ and won't sag over moderate spans nearly as much as thinner panels. Sure, 1/4-inch or 1/2-inch plywood has its place for things like drawer bottoms and cabinet backs, but the 3/4-inch thickness provides the structural backbone most builds demand.
Expert Insight: If you can only stock one thickness in your workshop, make it 3/4-inch. Its reliability across so many different applications makes it the most practical and efficient choice for both dedicated DIYers and professional builders.
Can I Get Plywood Custom Cut at the Store?
Yep, most big-box home improvement stores and lumber suppliers offer a cutting service. This can be a real lifesaver, especially if you're trying to fit a few 4x8 sheets into the back of an SUV. They can usually make basic cross-cuts to break down a panel into more manageable pieces, often for a small fee per cut.
Just keep in mind that these are rough cuts, not precision cuts. The accuracy on store saws can be a bit hit-or-miss. For any finished pieces where the dimensions need to be exact or you need angled cuts, it's always best to bring the pieces back to your workshop and use your own tools to guarantee that precision.
What Does CDX Mean on Plywood?
You'll see CDX stamped on construction-grade plywood all the time, and each one of those letters tells you something important about the panel.
- 'C' and 'D': These letters grade the quality of the front (face) and back veneers. A 'C' grade face might have some small, repaired knots, while a 'D' grade back is allowed to have larger knots and defects.
- 'X': This stands for "exposure." It tells you that the glue holding the layers together is water-resistant. It can handle getting caught in the rain during a construction project without falling apart.
But here’s the critical part: 'X' does not mean waterproof. CDX plywood is not meant for permanent, direct exposure to the weather. If you're going to use it outside, you absolutely have to protect it with a high-quality sealant or several coats of good paint.
For any project, having a reliable source for high-quality materials is key. At Yasu Trading Co. LLC, we provide a full range of construction essentials, including various plywood sizes to meet your specific needs. Get the right materials delivered on time, every time. Request a quote from Yasu Trading Co. LLC today.