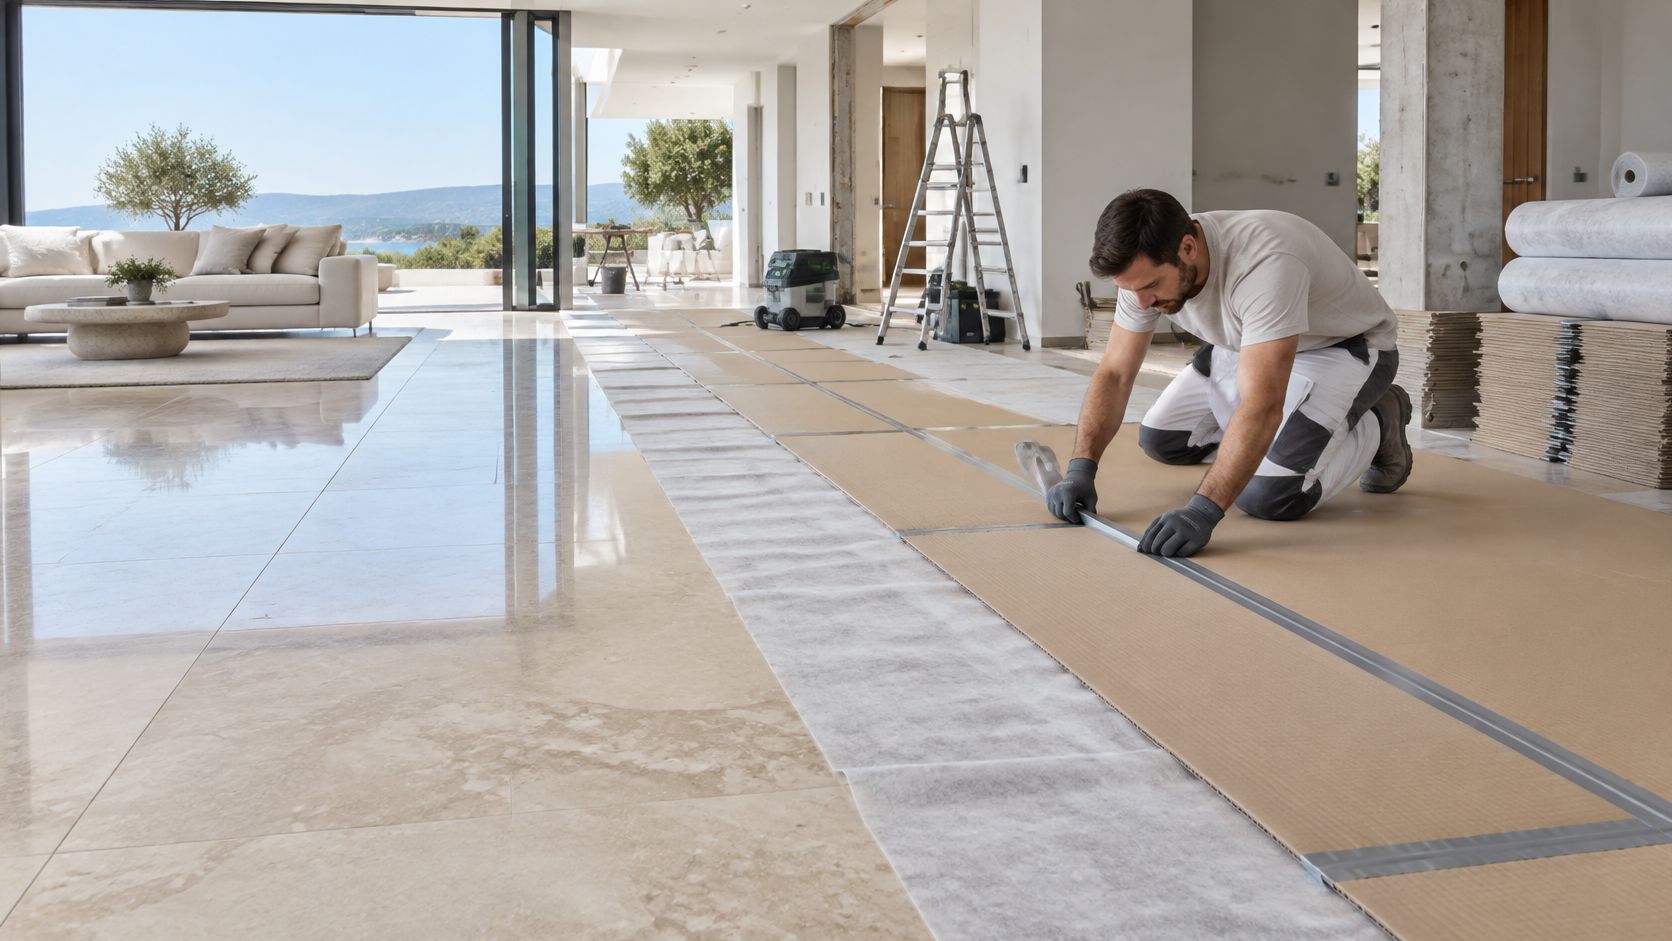
Floor Protection During Construction: Materials and Phases
You're at the final walk-through, the client is beside you, and the lobby stone that looked perfect three weeks ago now has a pale traffic lane, a chipped tile at the hoist landing and grey mortar worked into the grout. Nobody dropped anything dramatic. Boots carried grit, a pallet turned in the doorway, plaster splashed under a loose sheet, and every small incident stayed in the surface.
That's the pattern on most UAE fit-outs. Floor protection during construction fails through abrasion, point loads and contamination building up day after day. If you treat it as one roll of plastic laid once and forgotten, you'll pay for it in polishing, patch repairs, replacement material and a difficult handover conversation.
Why Floor Protection Is a Material Decision
A finished floor on a live site is a stored material, not a finished room. Your covering is its packaging, and it has to handle three separate threats at once. Abrasion comes from sand and cement dust dragged under boots and trolley wheels. Impact comes from dropped fittings, ladder feet and pallet edges concentrating load on one small point. Contamination comes from mortar, paint, cutting slurry and water settling into pores and joints.
The Scale of What Leaves Site
The cost of getting this wrong sits inside a much larger waste stream. According to a Dubai Municipality waste-management official cited in 2010 in ME Construction News reporting on contractor waste, Dubai's construction and demolition activity generated an estimated 3 million tonnes of waste each year, with about 500 trucks per day hauling waste to a recycling plant roughly 40 kilometres outside Jebel Ali. That doesn't measure any saving from floor protection. It shows the scale of material already leaving UAE sites, which is exactly where damaged flooring, contaminated coverings and cleanup debris end up.
Damaged floors don't just cost a repair. They create replacement material, extra hauling and another load for the skip.
So I treat protection as a phase-by-phase material decision shaped by heat, humidity and fine dust. Start with the surface, adjust for the phase of work, control moisture and dust, install in load order, check safety on live routes and finish with controlled removal and sign-off.
Matching Protection to Each Floor Surface
Choose your covering against three surface properties. How hard is it, how porous is it, and how does it react to moisture and heat? A hard glazed tile tolerates boards well but scratches when grit grinds beneath loose film. Porous limestone absorbs alkaline water and stains. Timber and vinyl respond to trapped moisture, heat and adhesive very differently from polished concrete.
Default protection by floor surface
| Surface | Recommended protection | Avoid | Main reason |
|---|---|---|---|
| Porcelain or ceramic tile | Rigid board over fleece, taped at joints | Bare film laid on grout lines | Grit under film scratches glaze and grout |
| Natural stone (marble, limestone) | Breathable fleece, with board on traffic routes | Plastic sheeting in direct contact | Trapped moisture causes staining and alkaline marks |
| Solid timber and engineered wood | Corrugated board, taped seams | Plastic film during wet trades | Moisture causes cupping and surface staining |
| Laminate | Hardboard around 3 mm, taped at edges | Adhesive tape on high-gloss face | Adhesive residue and surface damage on removal |
| Luxury vinyl tile (LVT) | Rigid board with film over it | Hot-taped plastic on sun-exposed floors | Heat indentation and adhesive marks |
| Carpet | Breathable carpet film or board over underlay | Wheeled loads without boards | Crushed pile and dye transfer from wet coverings |
| Polished concrete or power-floated screed | Breathable fleece, board at wheel routes | Non-breathable film during curing | Trapped moisture affects curing and surface finish |
| Terrazzo or resin floors | Rigid board at traffic zones, fleece in dust areas | Solvent-based tapes | Adhesive residue and surface softening |
Thickness and What Each Layer Actually Does
Plastic film is a contamination barrier, not an impact layer. It keeps dust and paint off, but it won't spread a pallet load. For that you need board. Around 3 mm hardboard suits laminate where the main job is spreading foot and ladder loads without a raised edge. 6 to 10 mm corrugated board gives timber and vinyl more cushioning and load spread on trolley routes. Breathable fleece belongs on stone and freshly cast screed because vapour can escape instead of condensing against the face.
Say a limestone lobby is laid, then wet plaster starts overhead. The table's default is breathable fleece, but that alone will let alkaline splashes soak through and won't handle the mixing station traffic. I'd change the specification to fleece against the stone, rigid board over every traffic route and a sealed absorbent layer at the wet zone, lifted daily for inspection. The stone still breathes, the board takes the wheels, and spills don't sit invisible against the surface.
Resilient products need the same surface logic. If you're specifying around rigid vinyl, it's worth understanding what SPC flooring means and how it's built before you tape anything to it. For external access, staging and soft ground before materials reach the floor, heavier systems such as Material Handling USA ground protection mats handle the outdoor load path so mud and point loads aren't carried straight inside.
Practical rule: The table is your starting point. The flooring manufacturer's written instructions override it every time, especially on curing, tape compatibility and permissible covering time.
Matching Protection to Each Construction Phase
One covering rarely survives a whole project because the risk changes as trades change. Blockwork produces grit and mortar. MEP first fix produces drilling dust and dropped fittings. Wet trades produce moisture and alkaline spills, painting produces drips and solvent, and commissioning introduces condensation. Laying the final-phase covering at the start means it's punctured, saturated or holding grit by the time finishes arrive.
The timeline below sets out the sequence most UAE fit-outs follow.
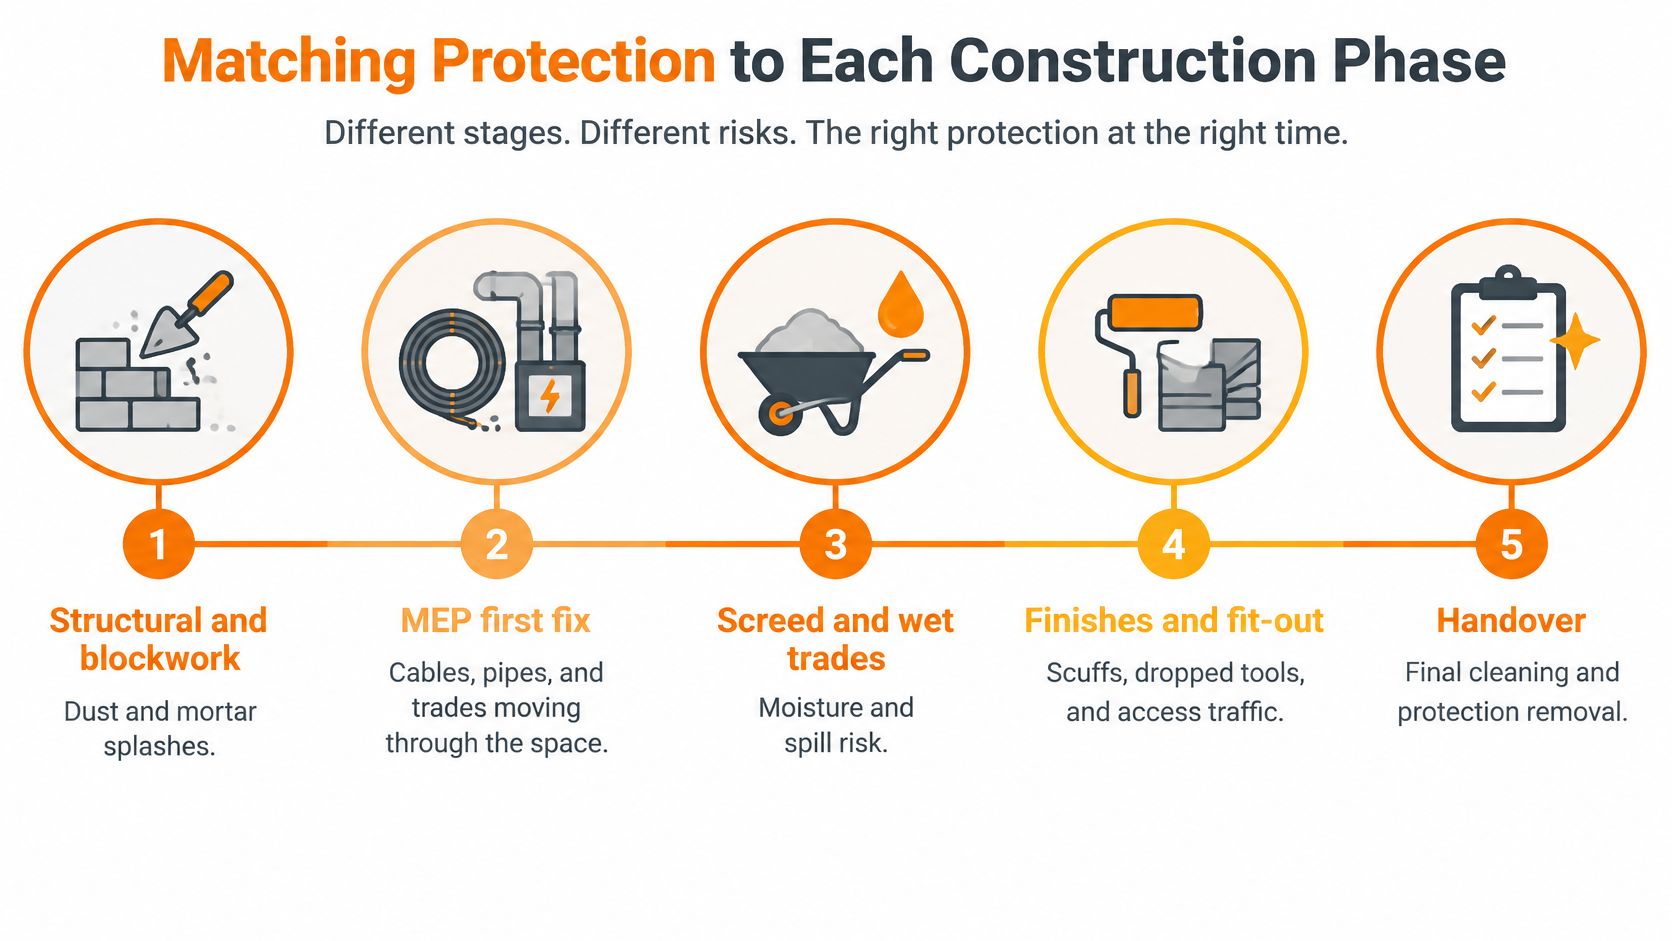
Protection layer by construction phase
| Phase | Main risk | Protection layer | Inspect when |
|---|---|---|---|
| Structural and blockwork | Dust, mortar splashes, cut debris | Film for dust plus rigid boards on routes | After each cutting session |
| MEP first fix | Drilling dust, dropped fittings | Corrugated board at drill zones | After each drilling day |
| Wet trades (screed, plaster, tile adhesive) | Moisture, alkaline spills | Breathable separation with absorbent layer | Daily and after any spill |
| Painting and finishing | Paint drips, sanding dust, solvents | Taped film with board at ladder zones | Before and after each coat |
| MEP commissioning and air-conditioning start-up | Condensation, chilled-water leaks, dust storms | Breathable layer and ventilation check | Daily during commissioning |
| Handover | Scuffs, final traffic | Final boards on routes, clean fleece elsewhere | Before the handover walk |
Work to Change Points, Not Dates
A change point is the moment one trade finishes and the next starts. That's when you lift, inspect, clean and either upgrade or strip back the covering. Don't leave the same gritty sheet in place because the programme says protection stays for six weeks. Trapped debris under an old layer causes more abrasion than a clean, lighter layer laid fresh.
Take a villa hallway across six weeks. During blockwork it carries film with boards on the barrow route. For MEP drilling, corrugated board replaces torn film at the drill zones. During screed and plaster, breathable fleece and an absorbent layer take over, then painting brings taped film over boards at ladder positions. Finally, clean fleece and fresh boards protect the handover walk.
For vinyl floors in particular, phase changes matter because heat and adhesive behave differently once finishing starts. Practical guidance on how to prevent construction damage to LVP flooring reinforces why you shouldn't rely on one thin layer from first fix to handover.
Moisture and Dust Risks Under Temporary Coverings
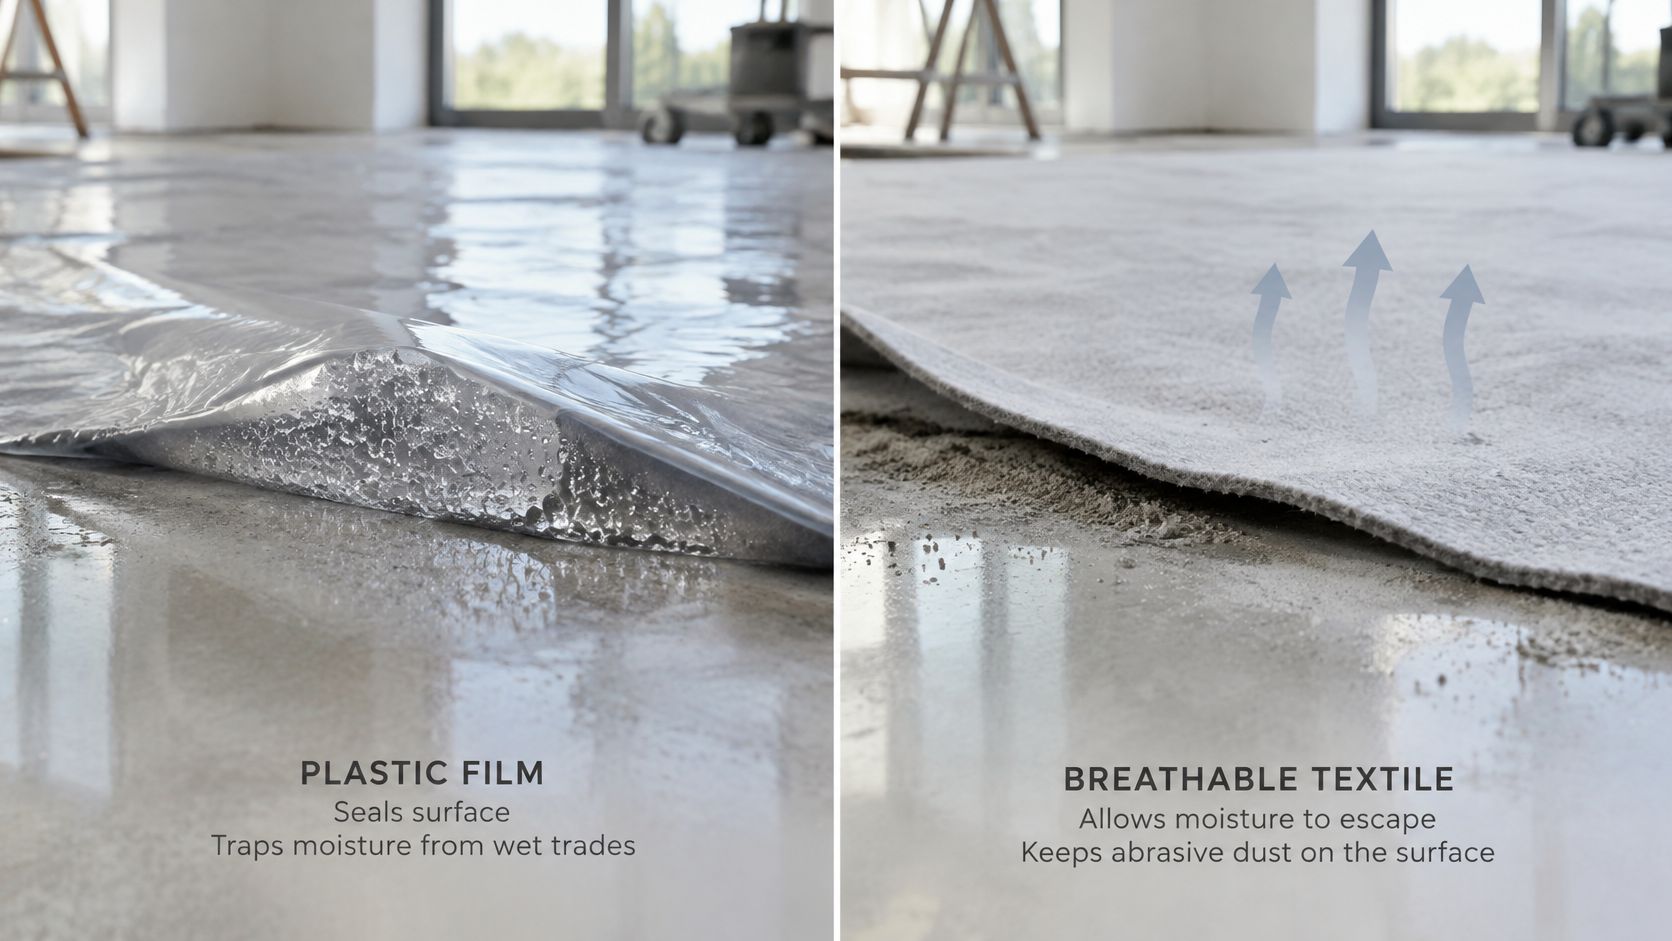
This is the central trade-off on UAE sites. Impermeable film stops dust and spills, but it can hold moisture against the floor. Breathable fleece lets vapour escape, but it can hold abrasive dust against stone, grout, timber or resilient flooring. Neither is right in every phase, and choosing by habit is where staining, adhesive failure and mould begin.
The comparison below shows the difference between trapping moisture and allowing the assembly to dry.
Dubai Municipality's Technical Guidelines for Indoor Air Quality recommend maintaining indoor relative humidity between 20% and 60% and keeping all building areas dry unless they're specifically designed to be wet. The same guidance warns that excessive moisture in building assemblies can promote mould growth and require costly remedial renovation. Wet screed, slab moisture, a plumbing leak or condensation trapped under film can push local conditions past that limit while the room itself feels dry.
That's the trap. The floor surface reads dry at handover, yet the assembly underneath has been sitting damp for weeks because the covering never let it breathe.
Fine Dust Behaves Differently in Dubai
Dust isn't just a cleaning problem. A Dubai-focused construction study published in 2025 in Springer research on construction air quality in Dubai monitored a high-rise apartment, villa and townhouse during slab casting, blockwork and MEP works. It found PM1.0 levels were especially high at the villa, where ground-level activities generated more dust, and pollution peaks aligned with intensive construction phases. Separate Dubai research summarised in that work found smaller particles, particularly PM2.5, can substantially infiltrate indoor spaces, with natural ventilation increasing susceptibility during dust-storm periods.
That fine fraction settles under loose edges and works like grinding paste. Every trolley pass and boot sole presses it into the finish. Seal joints at spill and dust entry points, but don't seal a drying floor shut.
Controls That Keep Both Risks Down
- Confirm dryness first: Check the substrate is dry, with no standing water, before any covering goes down.
- Isolate wet trades: Keep mixing, cutting with water and plaster away from completed floors, or add a sealed absorbent layer.
- Use breathable separation where drying continues: Don't put non-breathable film over curing screed or freshly laid stone.
- Lift and inspect: Remove sections periodically so concealed moisture and grit are found early.
- Ventilate during commissioning: Run mechanical ventilation or dehumidification to hold indoor relative humidity within the 20% to 60% range the Dubai guidance above sets.
Watch for staining, timber cupping, a musty smell, lifting tape and softening adhesive. Any one of those means lift the covering the same day, not at the next programmed inspection. Cleaning timing matters too. Knowing when to book post renovation cleaning helps you avoid sealing abrasive dust under a fresh layer or washing moisture into a floor that's still drying.
How to Install Floor Protection in the Right Order
Damage follows the load path. A trolley wheel, pallet edge or dropped pipe fitting concentrates force on a few square millimetres, and sand stuck to a boot sole turns that pressure into a scratch. Thin film can't spread the load, so the system goes down in a set order: a soft separation layer against the floor where the finish needs it, rigid panels where wheels run, and film last as the dust and spill barrier on top or in low-load zones.
Each layer only performs if the one beneath it was installed correctly. That is what makes the sequence worth following exactly.
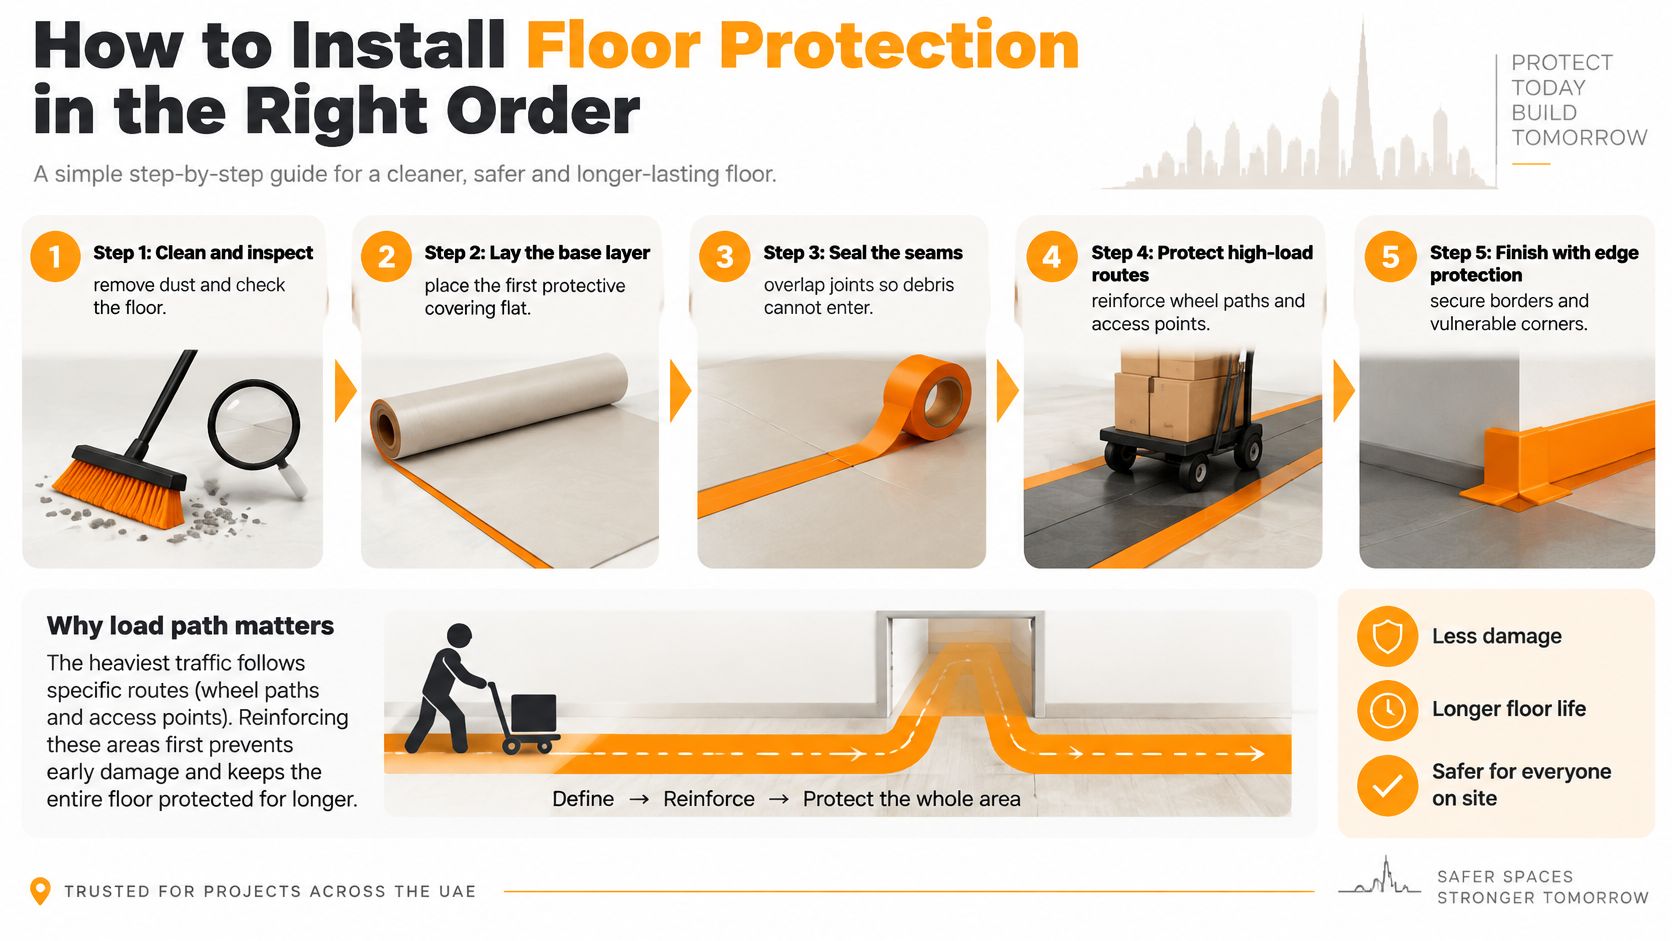
The Eight Steps
- Clean and confirm dry. Sweep and vacuum every particle off the substrate, then check there's no standing water. Grit left underneath will grind into the finish for weeks.
- Map the route. Mark the path from the unloading point and hoist to each workface before materials arrive. Protection follows logistics, not room boundaries.
- Lay the base layer. Butt fleece or board edges tightly with no gaps. A gap at a grout line or board joint becomes a grit channel.
- Board the wheel and hoist routes. Put rigid, impact-resistant panels where trolleys turn, pallets land and ladders stand. Replace any panel that has curled, punctured or taken on water.
- Overlap and tape film. Overlap joints by about 50 to 100 mm and tape with low-tack tape tested on an offcut. Tape to the protection itself, not directly to delicate finishes where you can avoid it.
- Seal spill-prone zones once the substrate has cured and dried. Run continuous film at wet-trade areas, drain points and sanitary rooms, with a breathable or absorbent layer beneath the film. Turn the film up slightly at edges so liquid can't migrate underneath.
- Ramp thresholds and landings. Fit ramped transitions at door thresholds and hoist landings so wheels don't catch an edge and tear the system open.
- Record and re-inspect. Log the install date and check the whole route after the first major delivery, then at shift changes on heavy days.
What Dubai Site Controls Require Around It
Dubai Municipality's construction safety provisions on dust and debris control require debris-disposal openings on each floor to be covered and protected against falling and diffusing materials and dust, and require ground-level unloading areas to be covered and protected. The same provisions instruct contractors to wet exposed dust and work areas during dust storms and to cover vehicle-movement entrances.
Pair the floor system with that source control. Covered access points, controlled wet cleaning and prompt removal of abrasive debris all reduce the load your covering has to carry.
The common failure is neat tape on the visible edge and an open gap two boards back. Cement dust finds that gap within a day.
Impact, Heat and Safety on Live Sites
A common approach is to choose a covering based on puncture resistance and cost, then never evaluate it as a walking surface. On a live UAE site, this is a mistake. A covering must be assessed for slip resistance, heat build-up, trip edges and emergency egress for the entire time it remains in place, especially where residents, hotel guests, or office staff use the path.
Dark, impermeable film in direct sun through glazing heats up fast. It can soften adhesive tape, mark vinyl and make the surface uncomfortable and unstable underfoot. Dust then settles over taped transitions, hiding the edge and reducing grip at exactly the point where levels change. A loose corner at an escape door isn't a housekeeping defect. It's an evacuation risk.
Formal Summer Controls Set the Standard
The UAE Ministry of Human Resources and Emiratisation's 2025 Occupational Heat Stress Prevention Policy ran from 15 June to 15 September and reported 99% compliance. That signals summer site controls are formal and audited, not informal. Your floor protection checks should be written into the same routine rather than left to whoever notices a lifted edge.
Run a simple risk check for every area. Match covering type against temperature, foot traffic, wheeled loads, wet cleaning and duration. A board that performs well for a two-day delivery route may curl, absorb mop water and lose its taped edges over a month in an occupied hotel corridor. Hotel renovations and occupied towers need high-visibility edges, ramped transitions and routes that never narrow or block escape doors.
The thickest covering is not automatically the safest. A poorly secured heavy sheet can create a greater fall risk than a thinner system that's correctly taped and inspected daily.
Check edges, ramps, tape adhesion and slip resistance every day, and again after heat exposure, wet cleaning or a dust storm. If a section has moved, don't tape over grit and move on. Lift it, clean underneath, relay it flat and record the check.
Removing Protection, Waste and Handover Sign-Off
Removal damages more finished floors than is often acknowledged. The programme is tight, cleaners are waiting, and someone rips film and tape off in long pulls across the surface. Adhesive lifts lacquer, grit trapped at the edge scores stone, and a board dragged sideways leaves the mark you've spent six weeks preventing.
Work in a controlled order. Start at the far end and lift coverings back toward the exit so you're not walking debris over exposed floor. Peel tape slowly at a low angle, folding it back on itself rather than pulling across the finish. Remove boards and fleece before any final cleaning starts, stack them away from the exposed surface and vacuum each bay as it's revealed.
The checklist below sets out the removal and sign-off sequence.
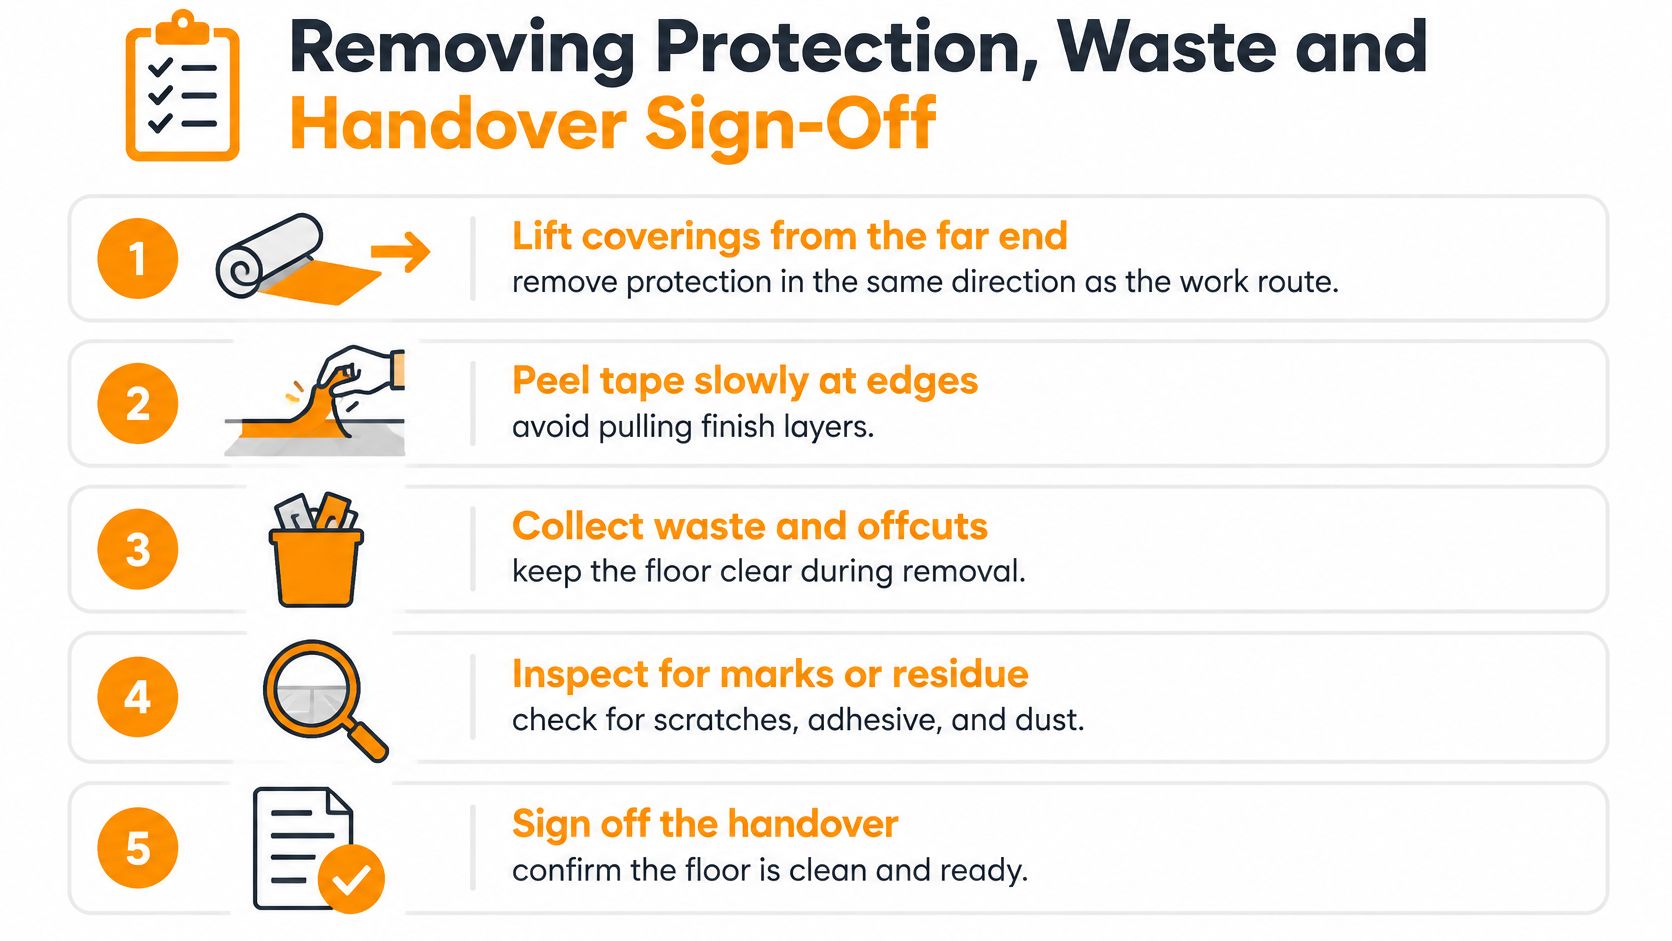
After each layer comes off, inspect for adhesive residue, scratches, moisture marks and staining. Log every finding with its date, room and grid location before anyone cleans or polishes over it. Photograph defects with a scale reference. That record separates pre-existing damage, protection failure and removal damage, and it's what makes handover sign-off credible.
Sort Waste at the Workface
Clean, dry film and board can go to recycling where your waste contractor accepts them. Coverings contaminated with mortar, paint or wet plaster go to general waste. Don't mix the two piles. Say a hotel lobby team strips film caked in wet plaster and stacks it on clean boards for reuse. The plaster transfers, the boards are contaminated and the whole stack is reclassified as waste. Sorting takes minutes at the workface and is almost impossible later. Our guide to construction waste disposal routes and segregation covers the practical sorting decisions behind that discipline.
The disposal burden is not theoretical. Abu Dhabi's official 2025 waste statistics recorded 4,181,468.01 tonnes of construction and demolition waste, approximately 46.3% of the recorded non-hazardous total of 9,032,360.88 tonnes. Those figures don't claim floor protection alone cuts waste by a set percentage. They show the scale of the stream your avoidable replacements and contaminated coverings join.
The Sign-Off Decision
Don't sign off on protection as a single purchase order. Confirm each point before the first pallet arrives:
- Surface named: Every floor finish has a covering selected from the surface defaults, checked against the manufacturer's instructions.
- Phase change points set: Each trade change has an inspection trigger and an owner.
- Wet zones isolated: Mixing and wet cutting are separated from completed floors.
- Routes boarded: Wheel, hoist and turning routes have rigid boards and ramped thresholds.
- Safety checked: Escape routes stay clear and heat, slip and trip checks run daily.
- Removal planned: Lifting order, residue checks and waste sorting are assigned before handover week.
For an unusual surface or route, such as a rare stone or an occupied hotel corridor, define the materials and quantities first. We can source custom materials and solutions for unique project requirements, and you can request a free quote for construction materials before programme pressure forces a substitute. That's the cheapest point to fix the specification.
Copyable Removal Checklist
- Lift from the far end: Work back toward the exit, bay by bay.
- Peel tape low and slow: Test residue removal on an inconspicuous area first.
- Vacuum as you reveal: Never drag boards or fleece across exposed flooring.
- Inspect and log: Record residue, scratches, moisture marks and staining with date and location.
- Sort immediately: Separate clean recyclable material from contaminated waste.
- Sign off last: Walk the floor under good light only after final cleaning.
If you're specifying floor protection for a live UAE project, send us your floor finishes, trade sequence and access routes and we'll help you match breathable coverings, impact boards, low-tack film and edge protection to each phase. Visit Yasu Trading Co. LLC to request a free quote and get municipality-compliant materials costed before the first pallet reaches your finished floor.